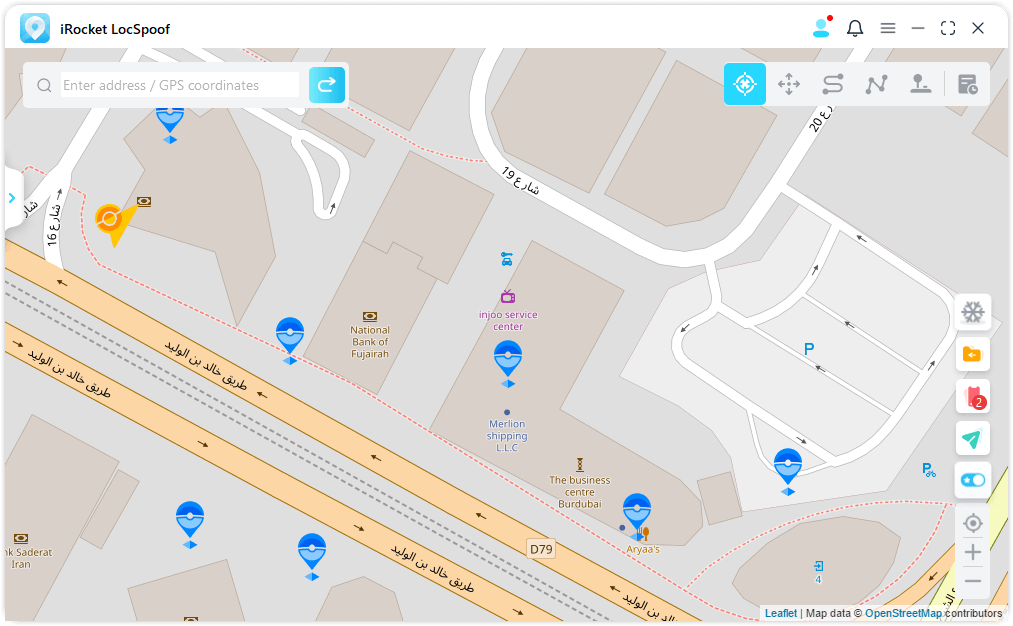
User Guide of iRocket LocSpoof
Can I change my location on iOS/Android devices? How can I customize the route without walking when playing AR games? With iRocket LocSpoof, you can spoof GPS location on your iOS/Android device flexibly and easily. Meanwhile, you can use Two-spot Mode and Multi-spot Mode to simulate GPS movement with customized route.
Part 1: Teleport Your Location
Step 1: Launch iRocket LocSpoof
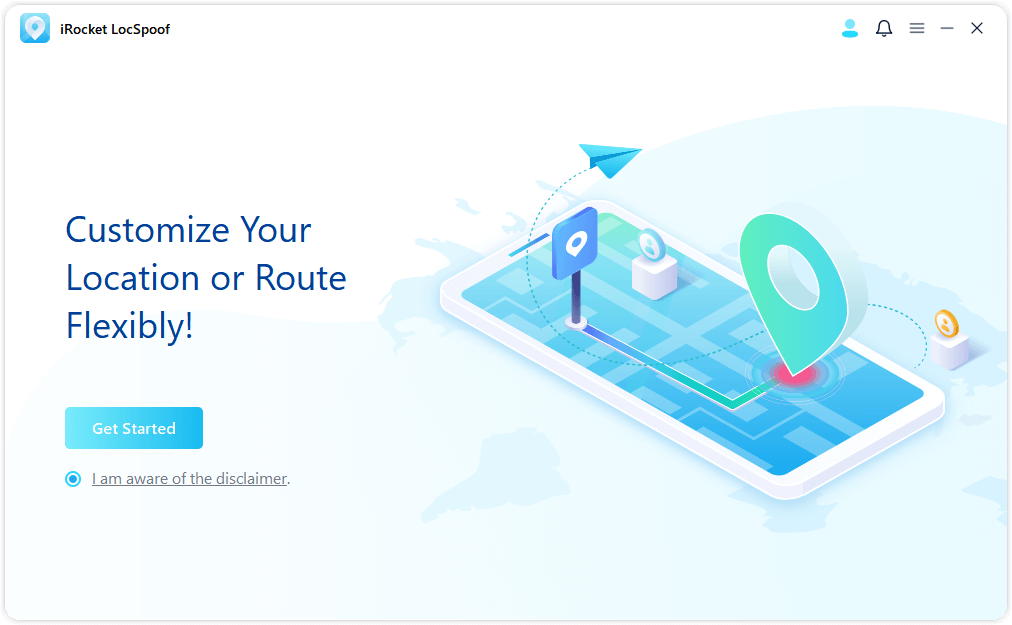
Install and launch iRocket LocSpoof on your computer. Click Get Started.
Step 2: Connect Your Device
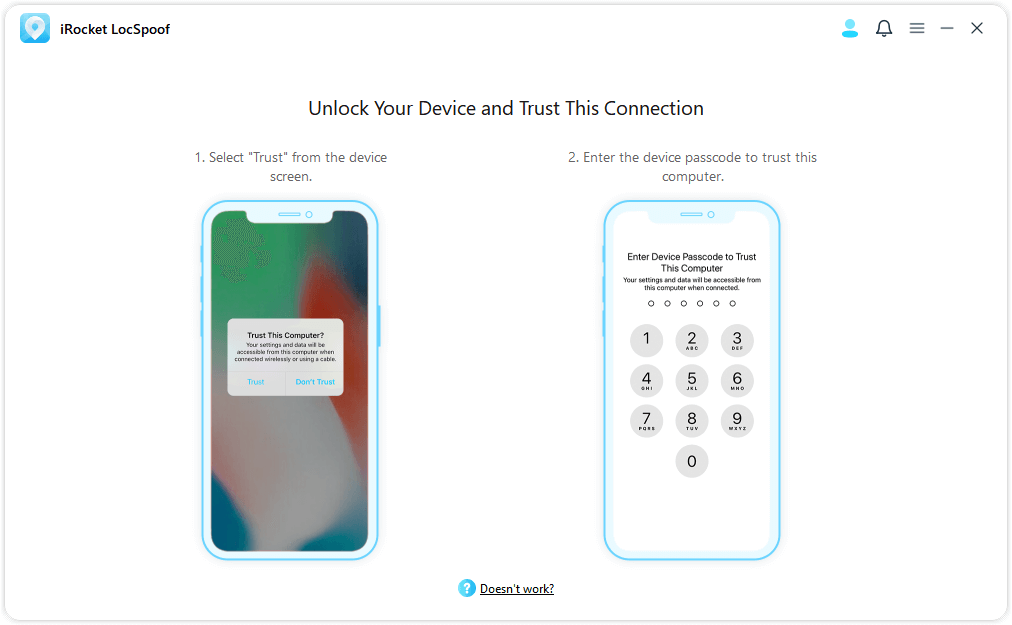
First connection: Connect your iOS device to the computer via USB cable. Next, unlock the device. Tap Trust on your iPhone when it asks you to Trust This Computer. Enter the screen passcode again to complete this process.
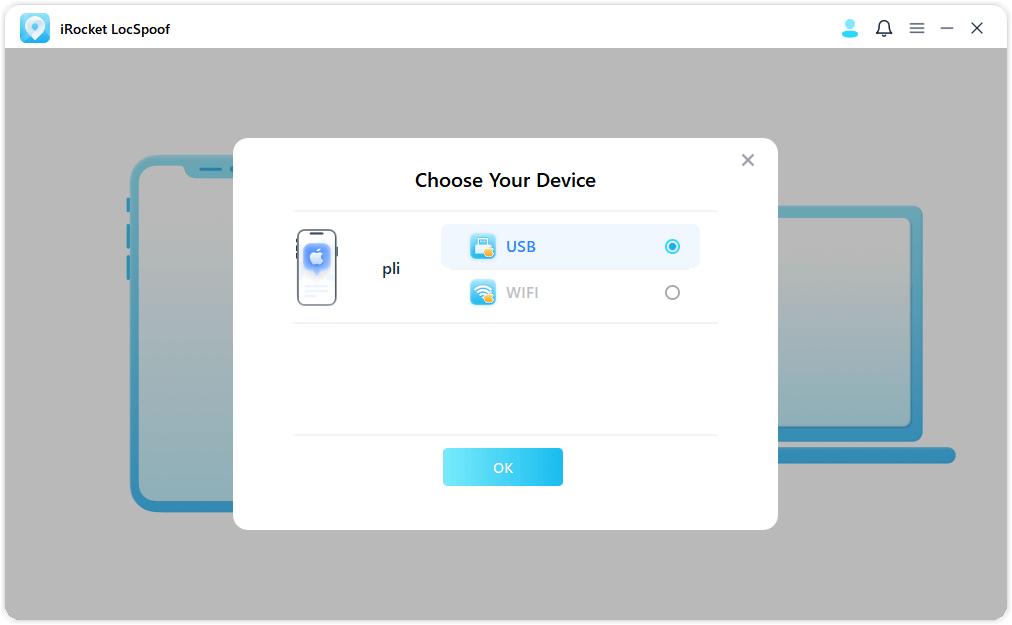
Second connection: After successfully connecting the device via USB cable for the first time, you can directly choose to connect your iOS device to the computer under the same WiFi network next time.
Attention:
- The iOS device and the computer should be connected to the same WiFi.
- Always keep your iPhone/iPad/iPod touch screen on when connecting to WiFi. (how to keep iOS screen always on)
Step 3: Teleport GPS Location with 1-Click
Choose Teleport Mode at the upper right corner. Now you can zoom in and out the map by scrolling the mouse, and select a destination. Or you can enter the address/GPS coordinates at the upper left corner to search your destination, for example, Vancouver.
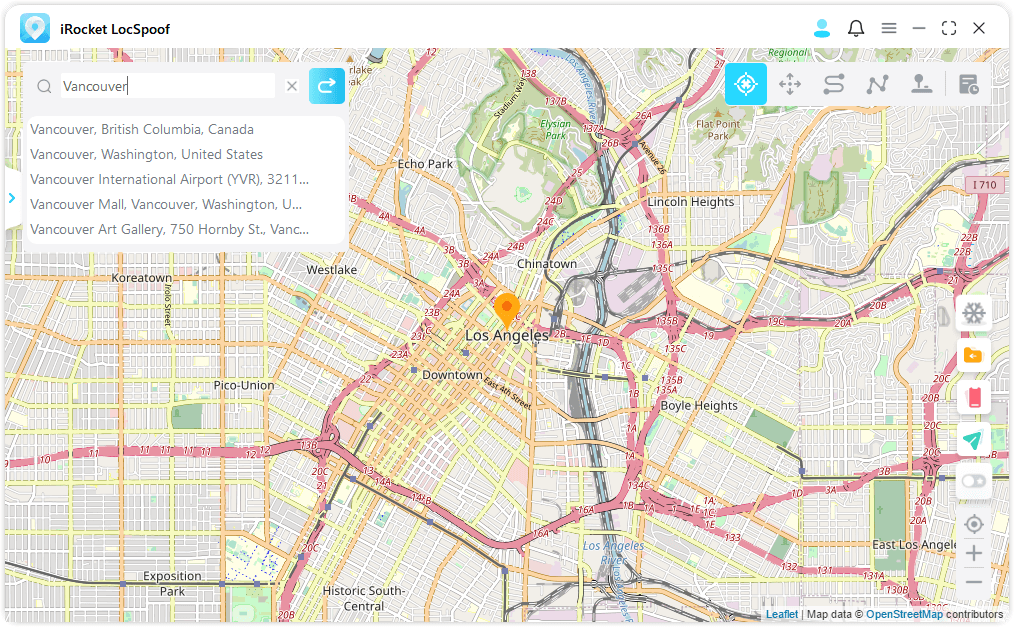
Step 4: Change GPS Location with 1-Click
As you select a destination, the sidebar will pop up. It shows you the destination information including the place name, coordinates, and the distance. Click Move.
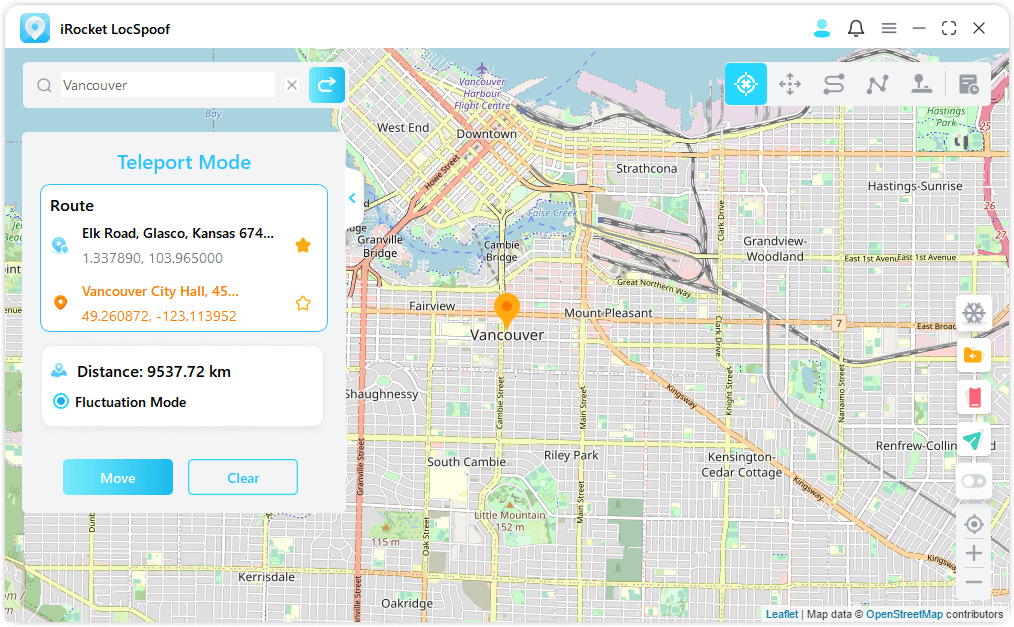
Your location will be changed to Vancouver immediately. The all location-based applications on your iPhone will be changed to Vancouver as well.
Part 2: How to Use the LocSpoof iOS App to Change Location
Pre-installation Instructions:
- 1.Direct installation on iPhone is not available: LocSpoof iOS app cannot be directly installed on your iPhone. You need to install the LocSpoof Assistant program on your computer first, which will then help you install the LocSpoof iOS app on your iPhone.
- 2. System Requirements:
-LocSpoof iOS Assistant Win: Windows 7 - Windows 11
-LocSpoof iOS Assistant Mac: Mac OS 10.15 - Mac OS 15
-LocSpoof iOS App: iOS 13 - iOS 16; iOS 17.2 and above
1 Installing the LocSpoof iOS App
Step 1:Download the LocSpoof iOS Assistant on your computer.
Step 2:Launch the LocSpoof iOS Assistant on your computer and log in with your Apple ID.
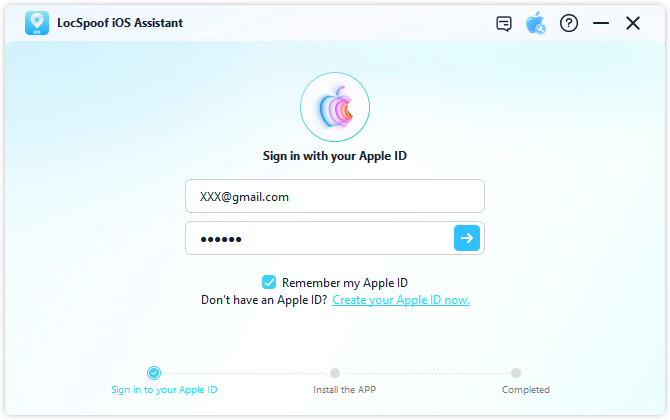
Step 3:Connect your iOS device to the computer using a USB cable, and click "Trust" on your iPhone to trust the computer. Once connected, click the "Install LocSpoof iOS App" button.
- Devices running iOS 17 and above need to enable Developer Mode on the iPhone following the prompts.
-Windows users might need to install Apple driver.
-Mac users might need to enter the computer password to grant permission.
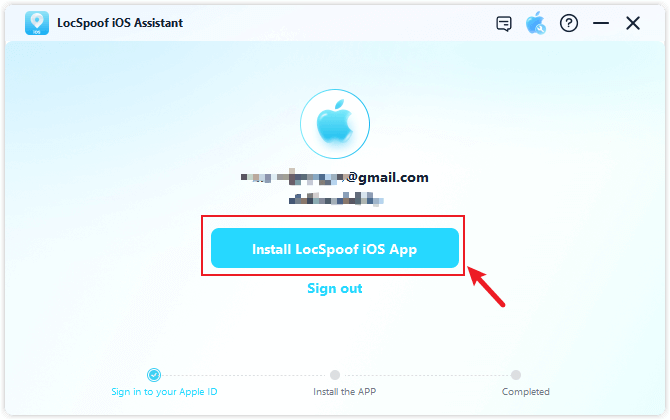
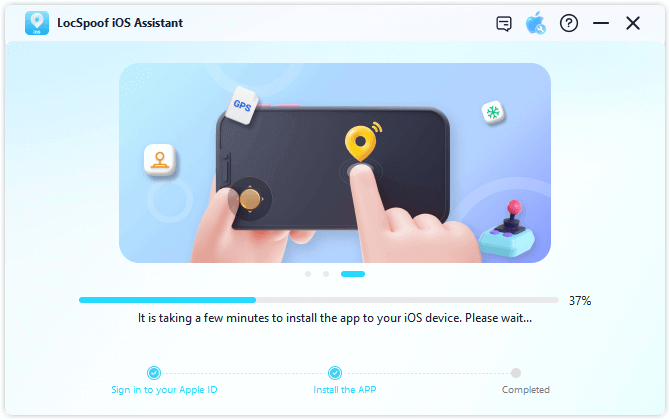
Step 4:Wait for the LocSpoof iOS app to install on your device. Ensure a stable connection between your device and the network during the installation.
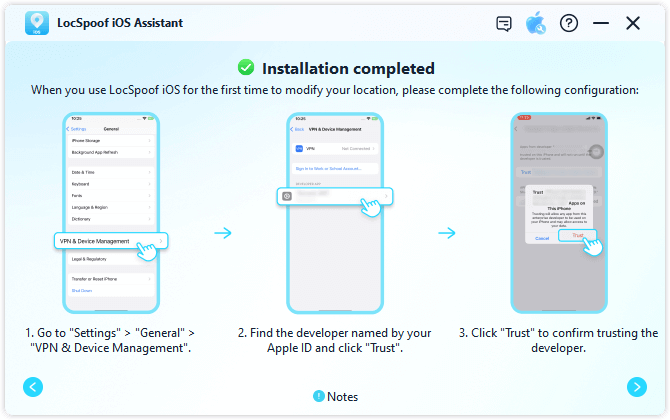
Step 5:Once the LocSpoof iOS app is successfully installed, follow the on-screen instructions to trust the app. Go to "Settings" > "General" > "VPN & Device Management," find the developer named after your Apple ID, and click "Trust."
2 Configuring VPN with iGoSpeed App
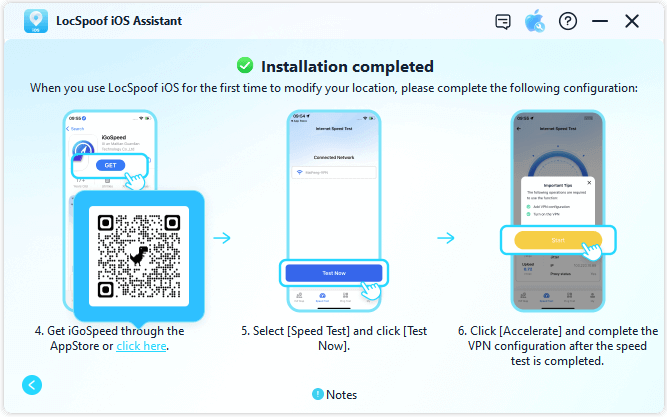
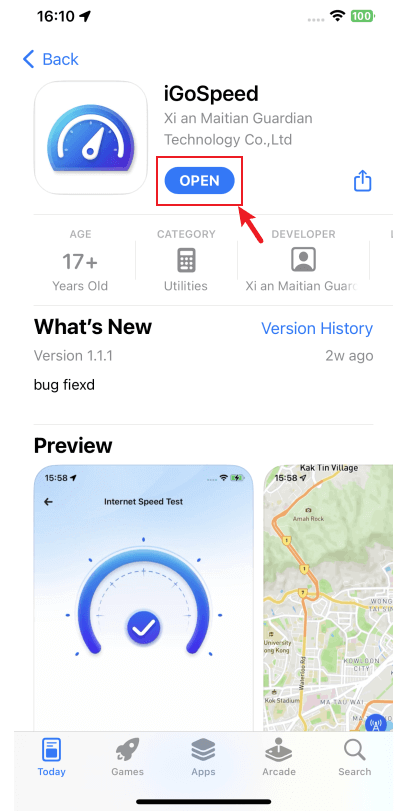
Step 1:Scan the QR code or install the iGoSpeed app from the App Store.
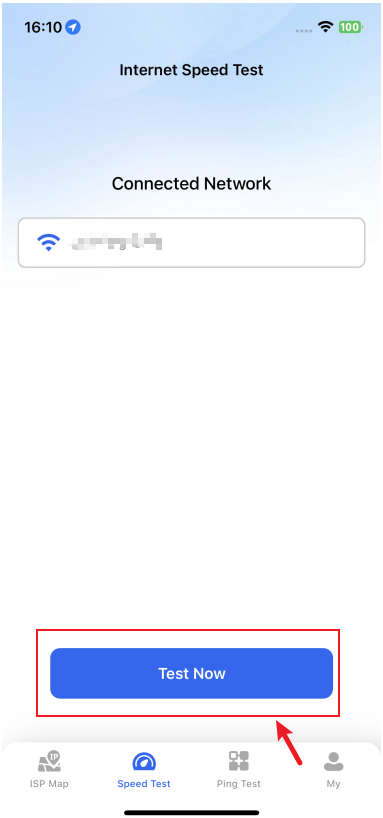
Step 2:Select "Speed Test" and click "Test Now."
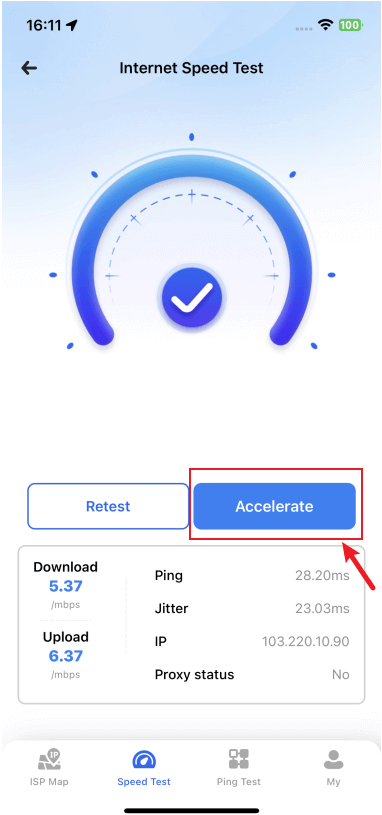
Step 3:After the speed test, select "Accelerate" and complete the VPN configuration.
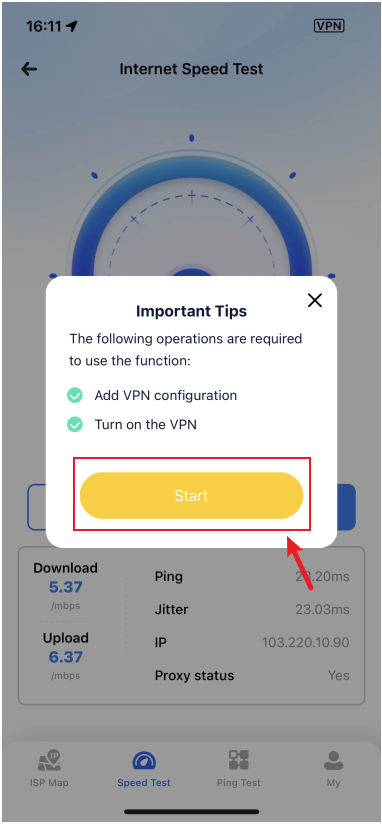
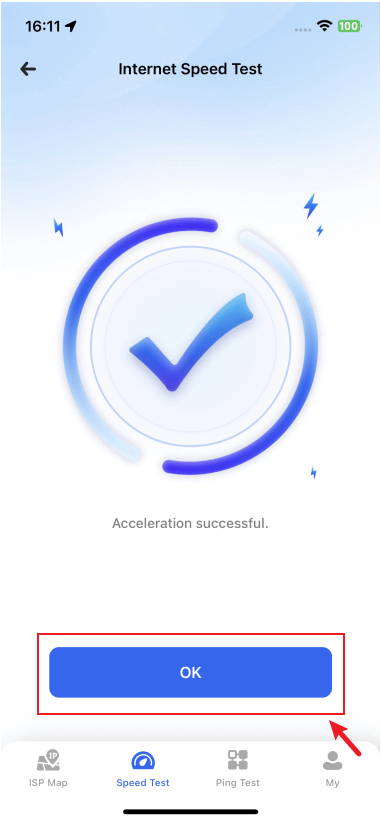
Step 4:Wait patiently. Once the acceleration is finished, click “OK” to launch LocSpoof iOS APP automatically.
3 Changing Location with the LocSpoof App
Step 1:Install the Profile.
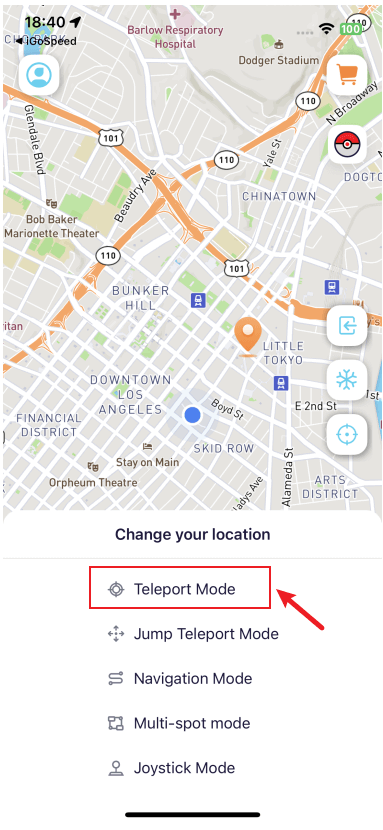
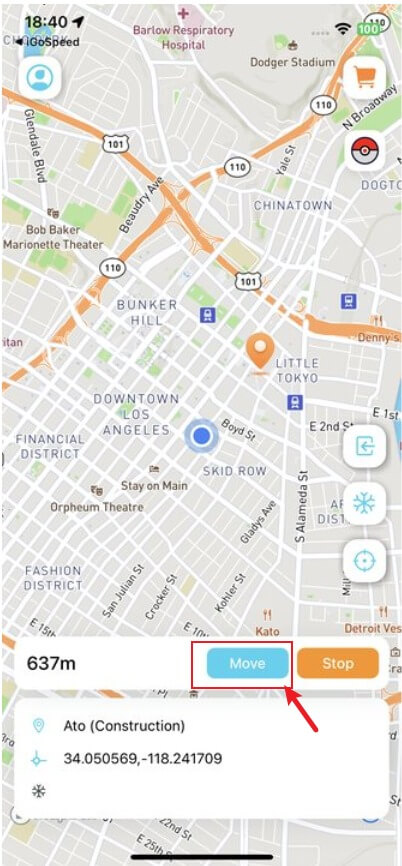
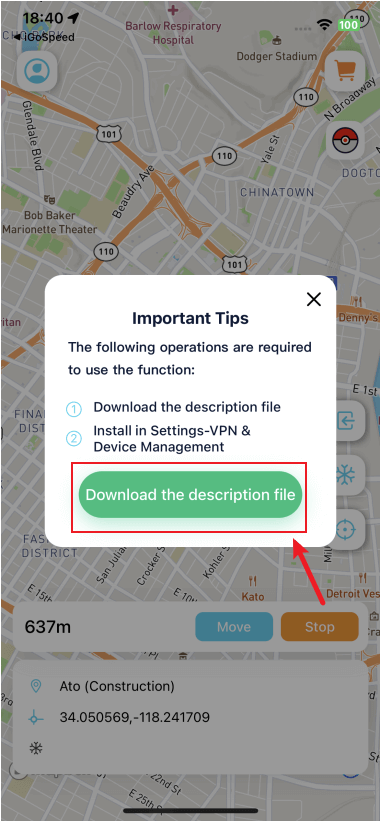
1.Open the LocSpoof iOS app, select your preferred method of changing location, and click "Move." Follow the instructions to click the "Download Profile" button.
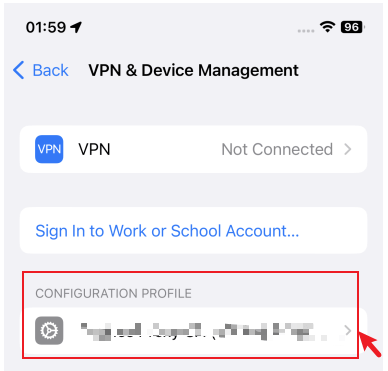
2. Go to iPhone Settings > General > VPN & Device Management > find the downloaded profile > click "Install." After installation, you will automatically return to the LocSpoof iOS app.
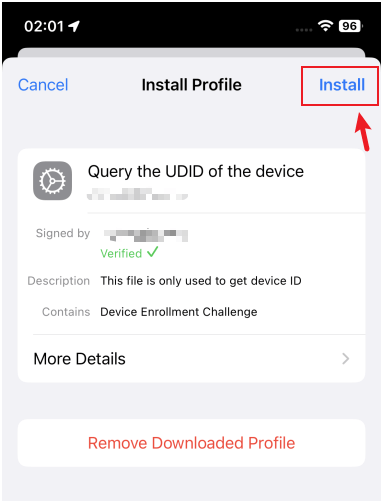
Step 2:Change Location
Choose your desired method of changing location, click "Move" and your location will be modified accordingly.
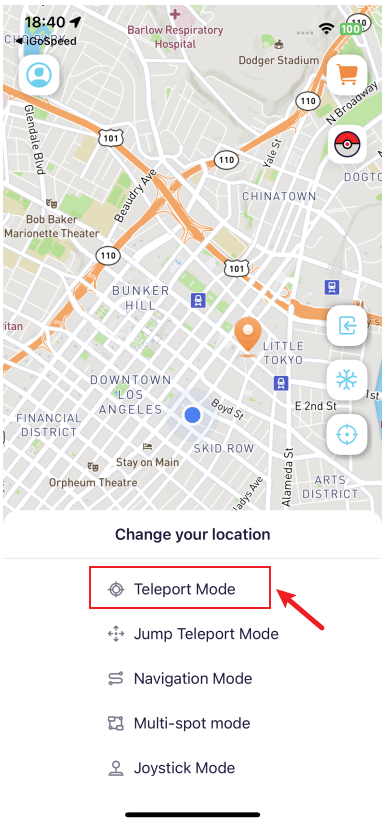
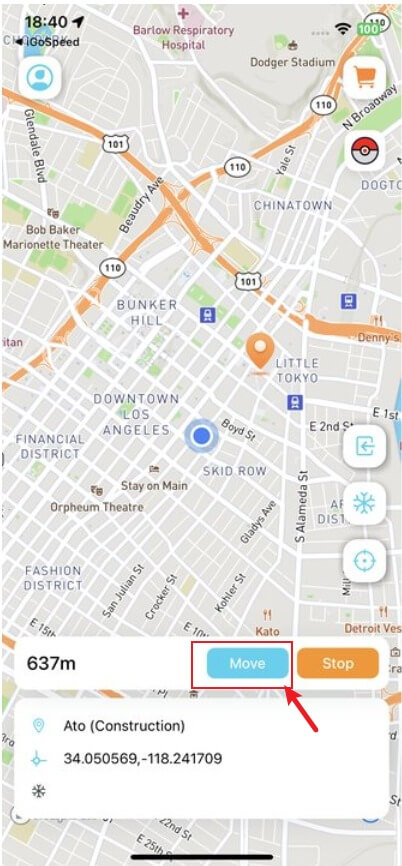
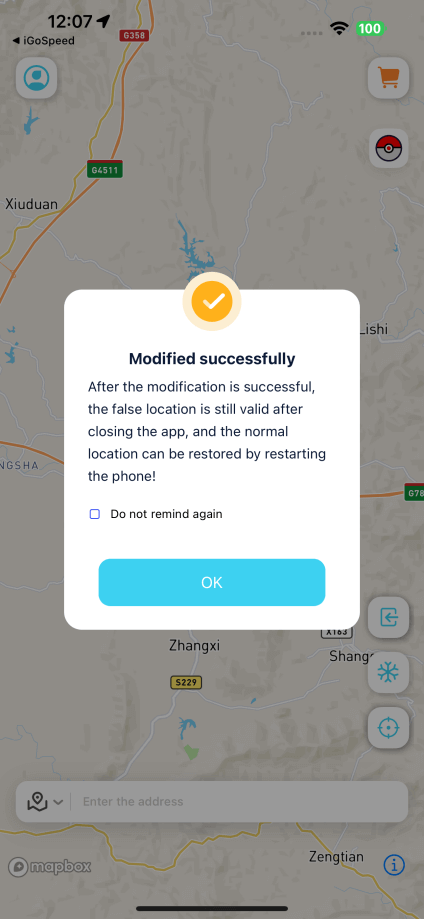
- The LocSpoof iOS app is valid for 7 days. To ensure uninterrupted use, reinstall the app before it expires.
You can check the remaining validity of the app through "Personal Center" > "Expiration Date."
Part 3: Draw Routes to Move
Mode 1: Jump Teleport Mode
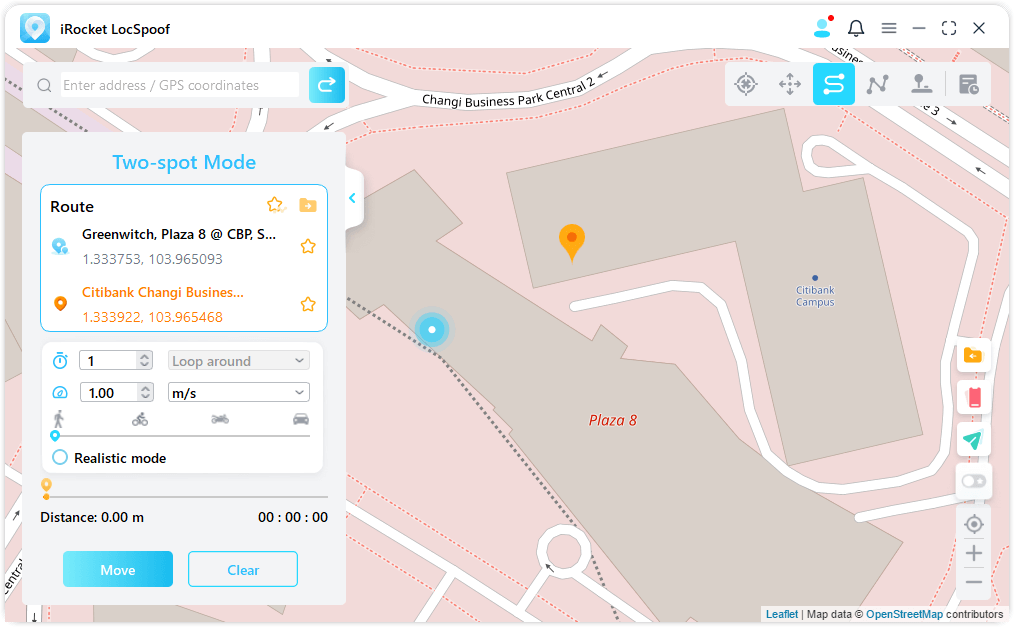
Step 1: If you want to customize the jumping teleport route, you can select Jump Teleport Mode.
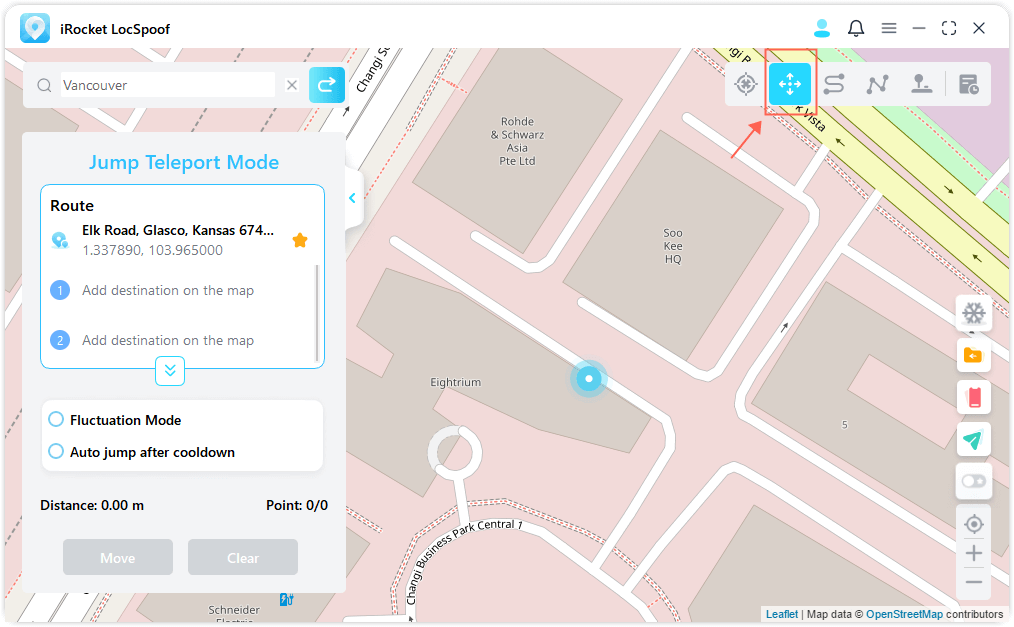
Step 2: Select different jumping teleport spots one by one on the map that you want to pass by. Or enter address/GPS coordinates to set the spots.
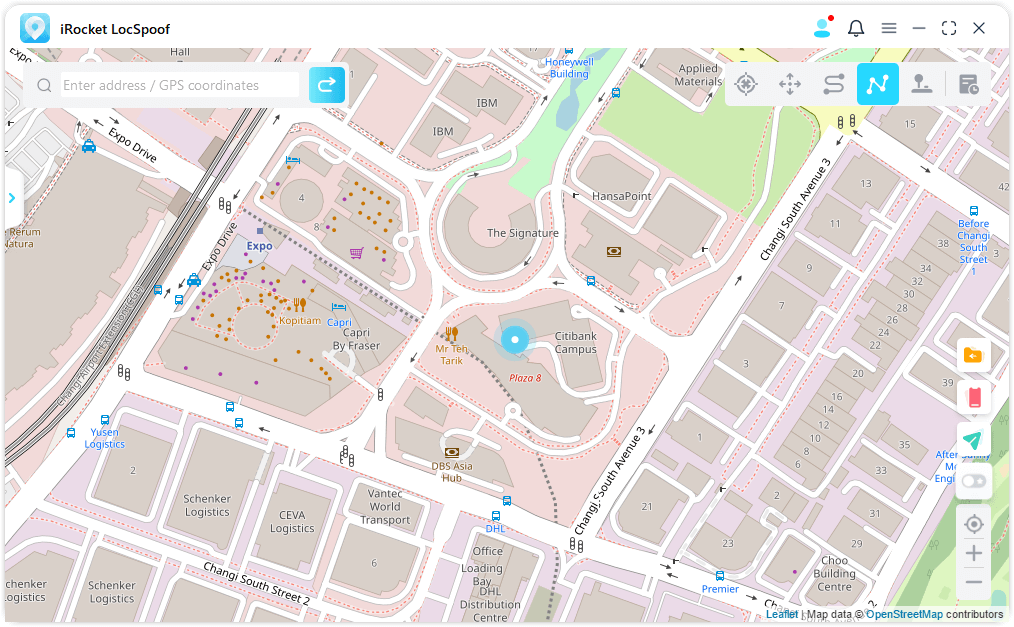
Step 3: After selecting a route, click Move to jump to the next point, and you can switch between the previous point and the next point at will.

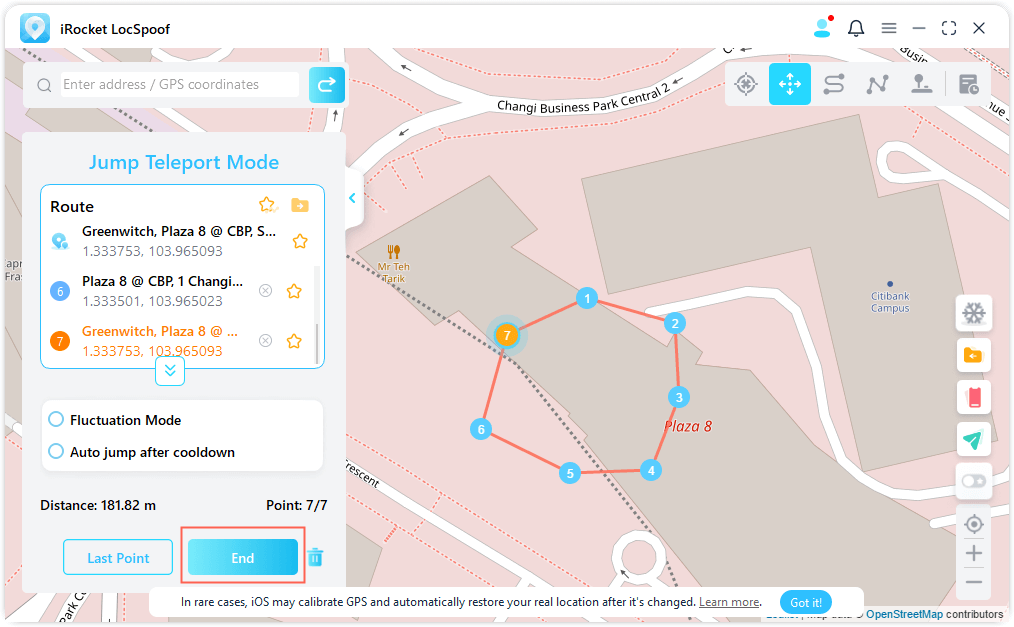
If you want to end the route, skip to the last point and click End.
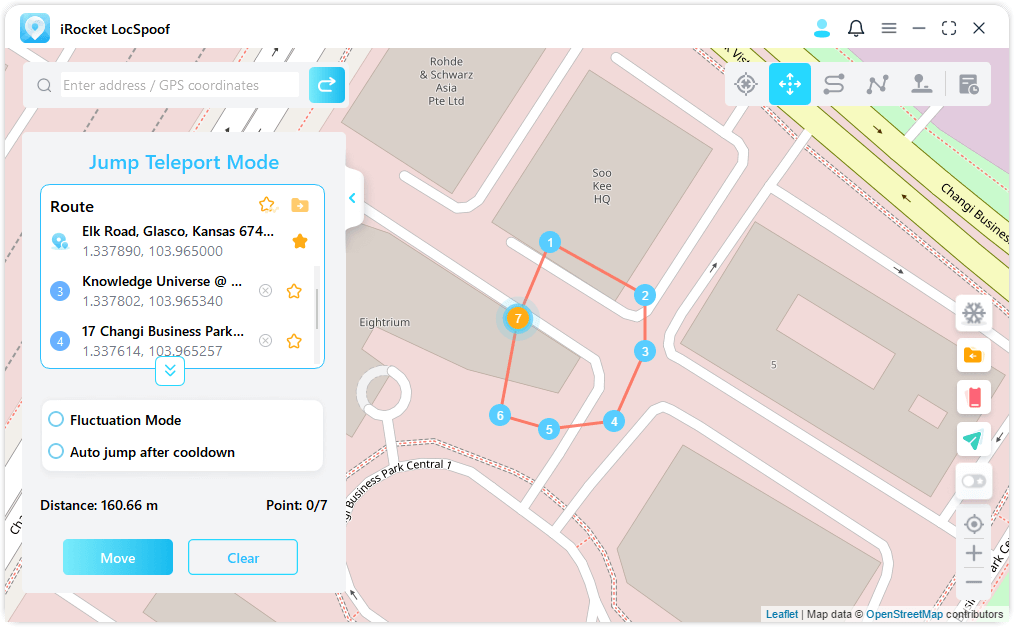
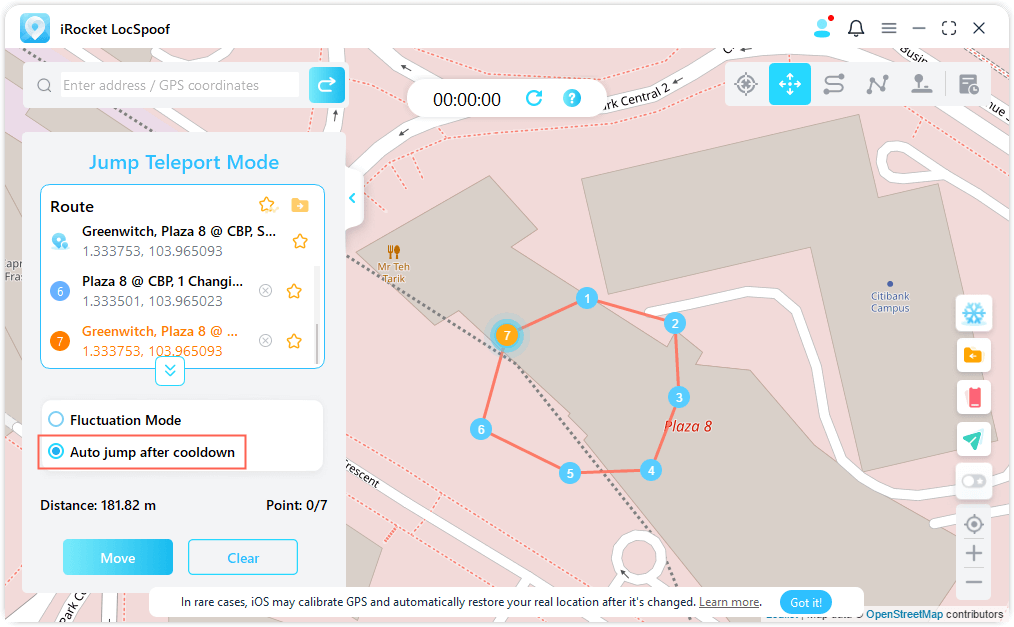
Also, you can tick Auto-jump after cooldown before starting the route, and the checked route will automatically jump to the next point based on the cooldown timer until the route is completed.
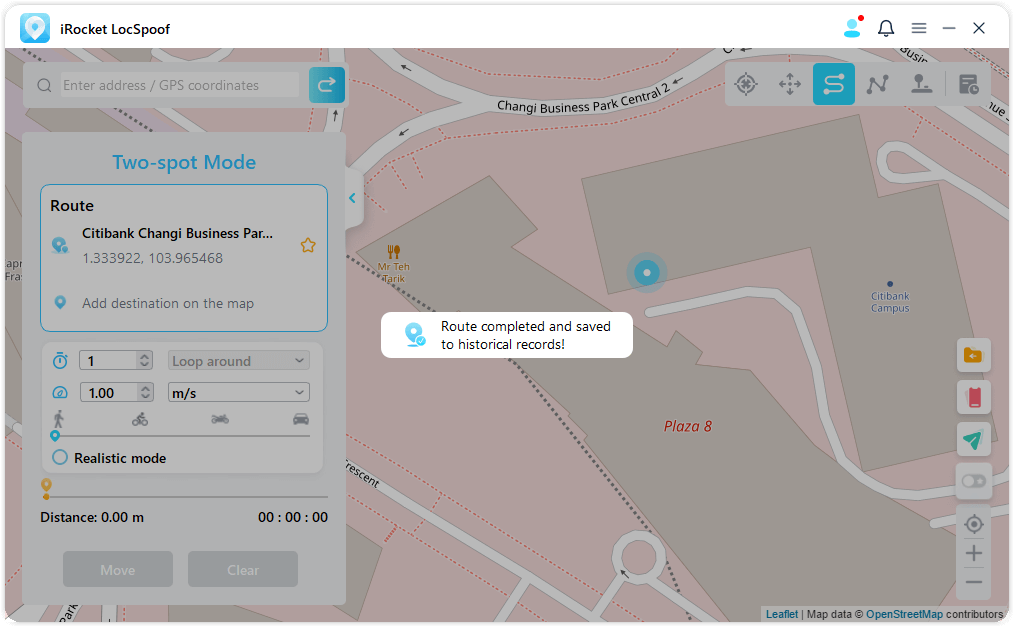
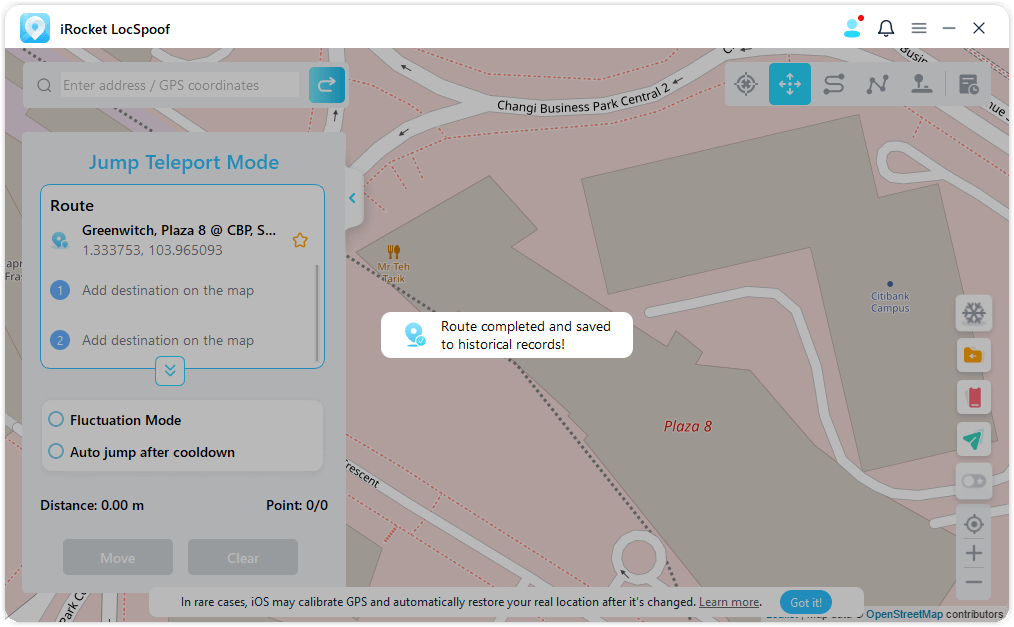
As it moves on the map, the GPS on your iOS devices moves without lag. After completion, there will be a sound and a prompt pop-up window will pop up.
Mode 2: Two-spot Mode
Step 1: Choose Two-spot Mode. If you want to customize a route, you can select Two-spot Mode at the upper right corner.
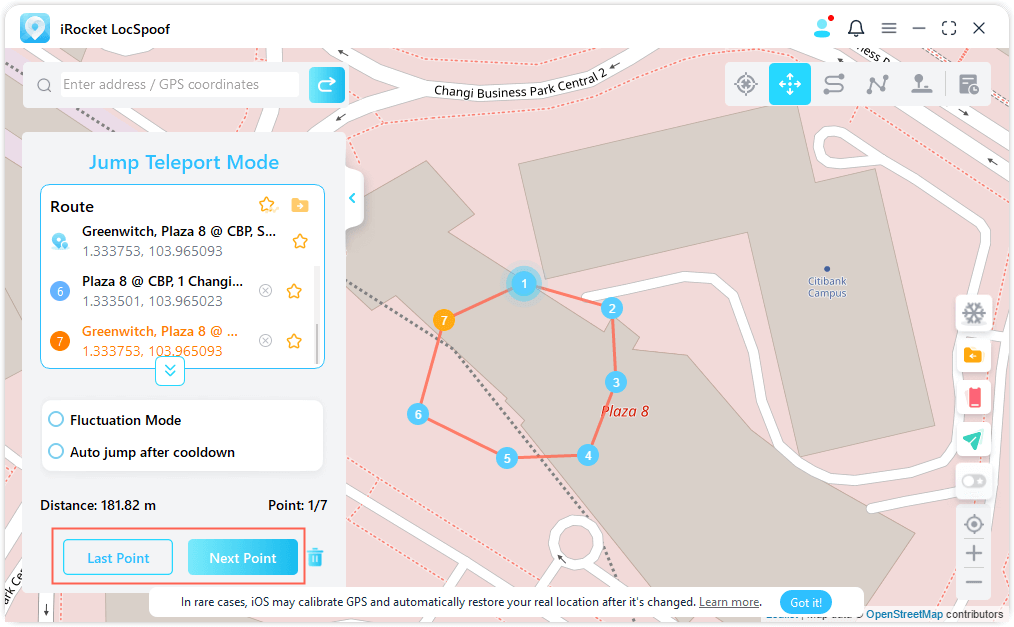
Step 2: Plan Two-spot Route. Pinpoint a location on the map as your destination. You can also choose a destination by entering the address or coordinate in the Search box. The chosen destination will be added in the sidebar. You can see the place names and the coordinates of your current location and the destination.
You can now set up the number of times for the virtual route to move back and forth between the two places. Drag the Speed bar to customize your moving speed.
When it is all set up, click Move to start simulating the movement. You can see the distance and time change as it moves.
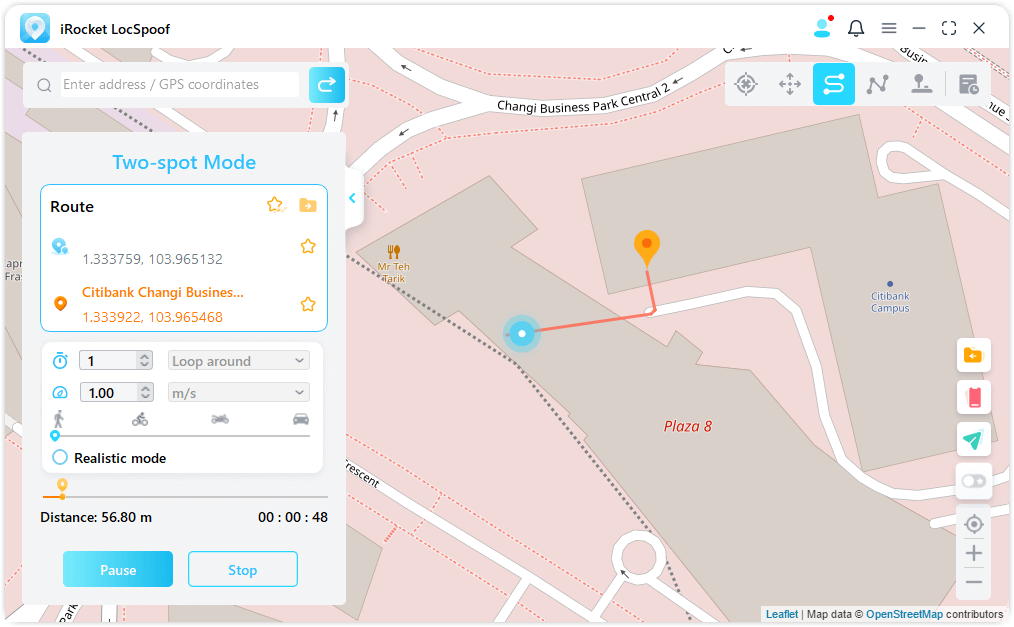
As it moves on the map, the GPS on your iOS devices moves without lag. After completion, there will be a sound and a prompt pop-up window will pop up.
Mode 3: Multi-spot Mode
Step 1: Choose Multi-spot Mode. If you want to plan a route with multiple spots, you can select Multi-spot Mode at the upper right corner.
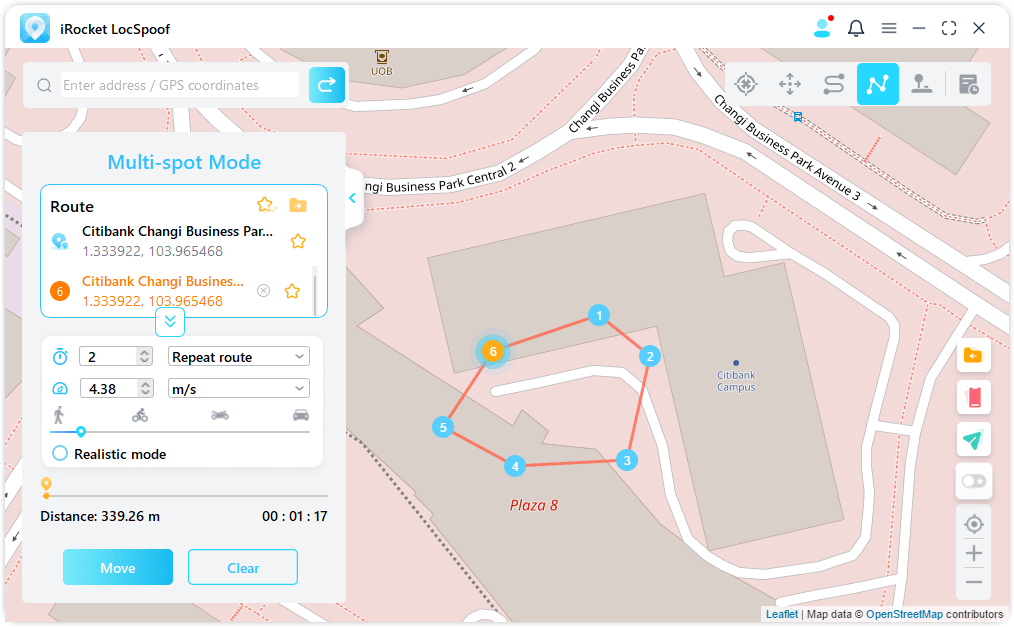
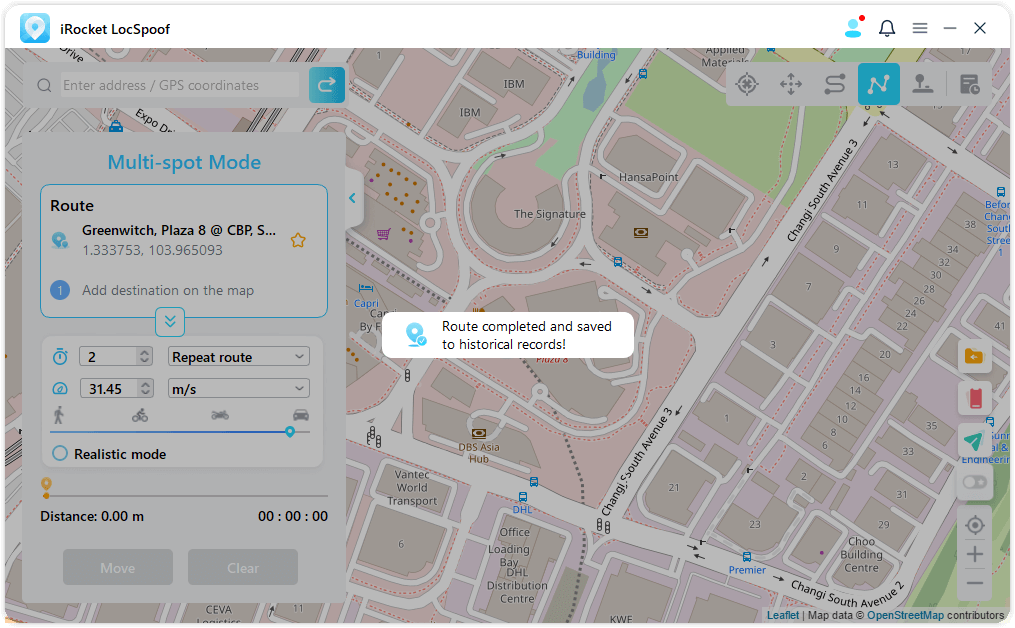
Step 2: Plan Your Multi-spot Route. Select different spots one by one on the map that you want to pass by. Or enter address/GPS coordinates to set the spots.
Set the number of round trip times by entering the number. And set the speed by dragging the Speed bar. After the Times and Speed are set up, click Move to start the journey.
iRocket LocSpoof will simulate the movement with the speed that you set. You can enjoy all location-based AR games without any walking!
As it moves on the map, the GPS on your iOS devices moves without lag. After completion, there will be a sound and a prompt pop-up window will pop up.
Part 4: Use GPS Joystick
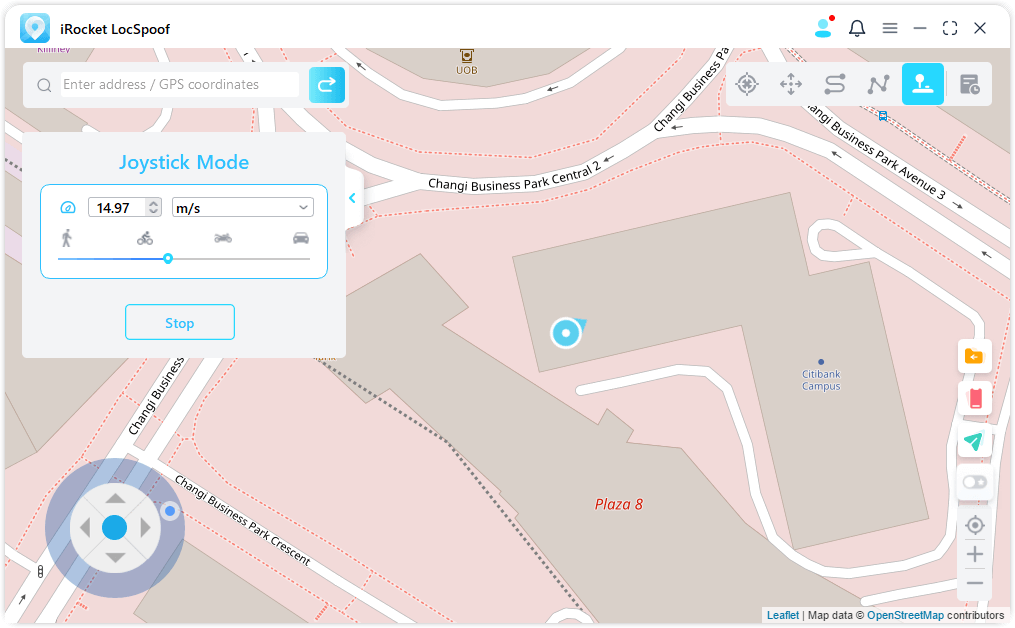
Step 1: Choose Joystick Mode. If you want to mock your GPS location with joystick, you can select Joystick Mode at the upper right corner. One click to Move automatically.
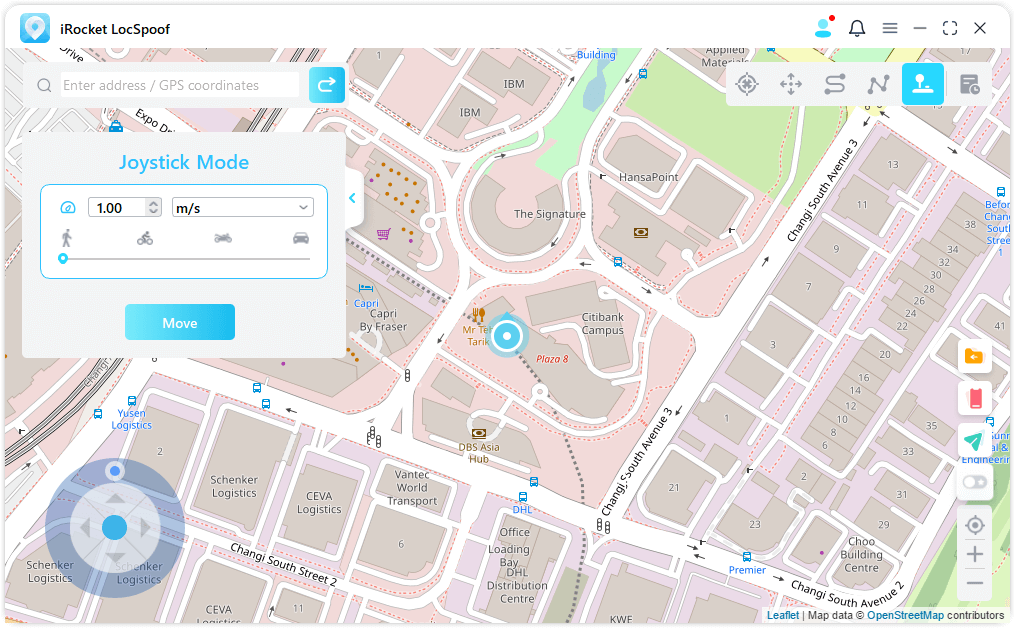
Step 2: Set the Direction. Set 360-degree directions. Move forward or reverse by clicking the Direction button. You can change the directions in real-time marching. Or you can use keys W, A,S, D, or keys Up, Down, Left, Right to control GPS spot movement.
Part 5: Explore More Features
Feature 1: Circle Route
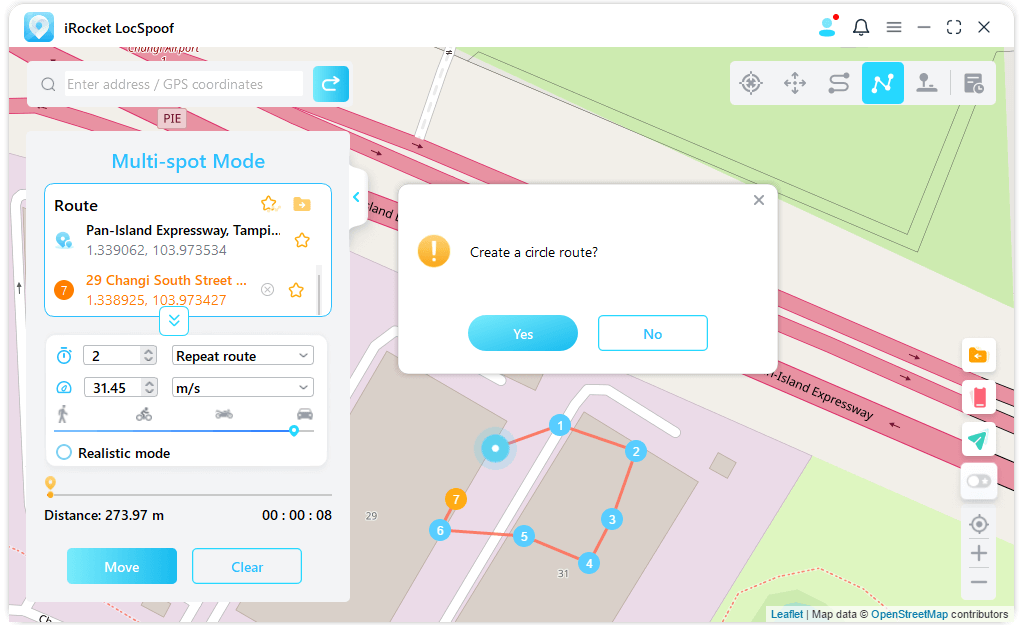
Under Multi-spot mode, when the starting point and the end point are nearby, the program will automatically ask if you need to create a circle route. Click Yes, it will align the starting point and the end point; click No, the end point will keep the exact coordinates.
Feature 2: Realistic Mode
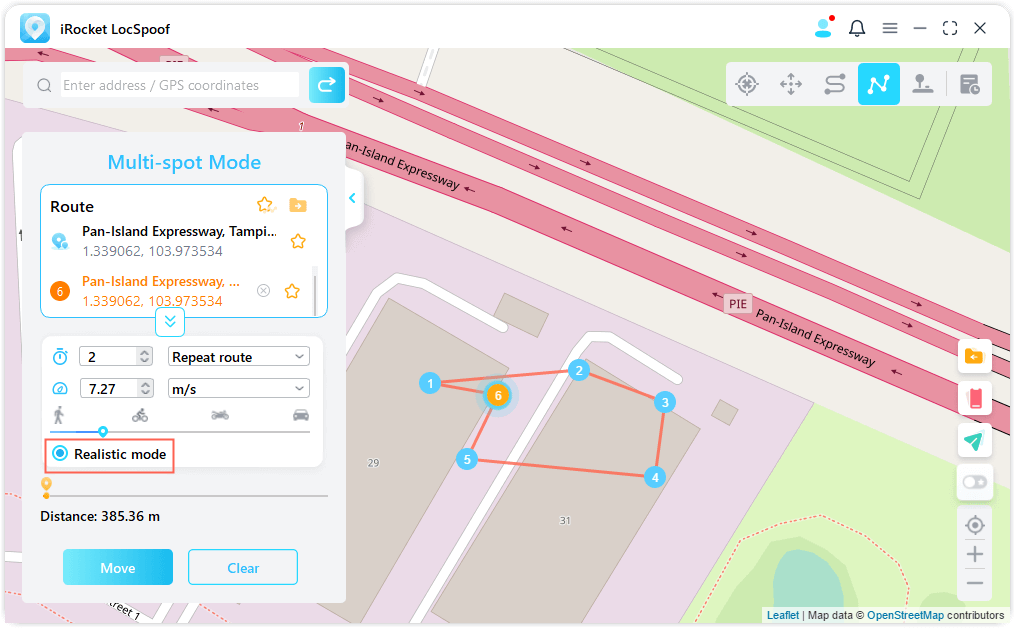
Check Realistic Mode, and then moving speed will randomly vary in the upper or lower 30% of selected speed range. The speed varies every 5 seconds.
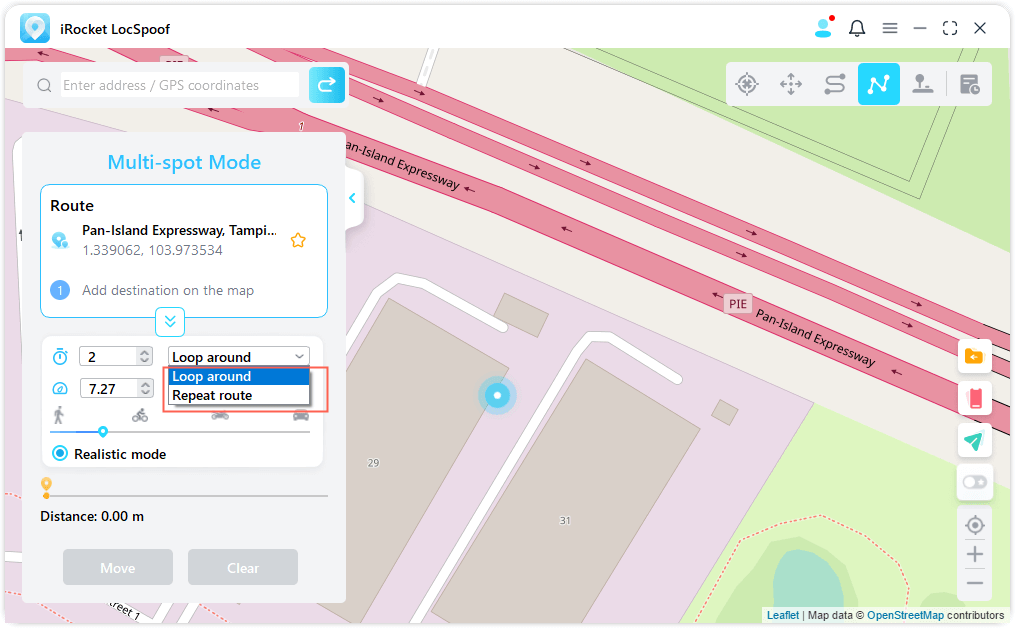
Feature 3: Returns or Loops
When the times are greater than 1, the user can choose to return original road (from start to finish, and then return), or loop (from start to finish, from start to finish again) in the form of a repeat this route.
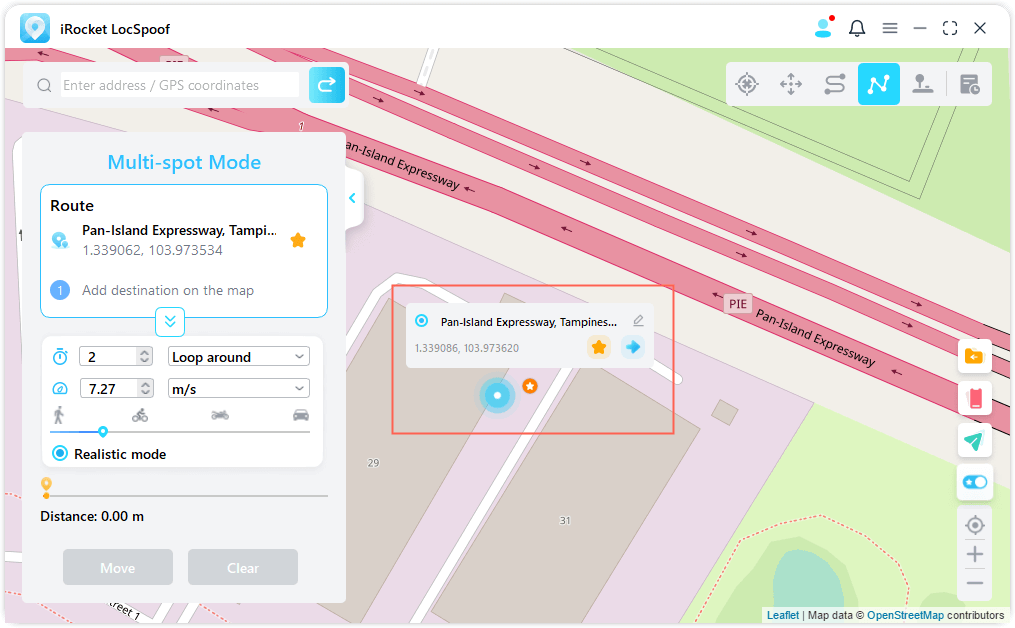
Feature 4: Collect Spots and Routes
When using Teleport Mode and searching for a new spot, you can click on the Star icon to collect this spot. Turn on the Star button in the lower right corner to display your favorite spots on the map.
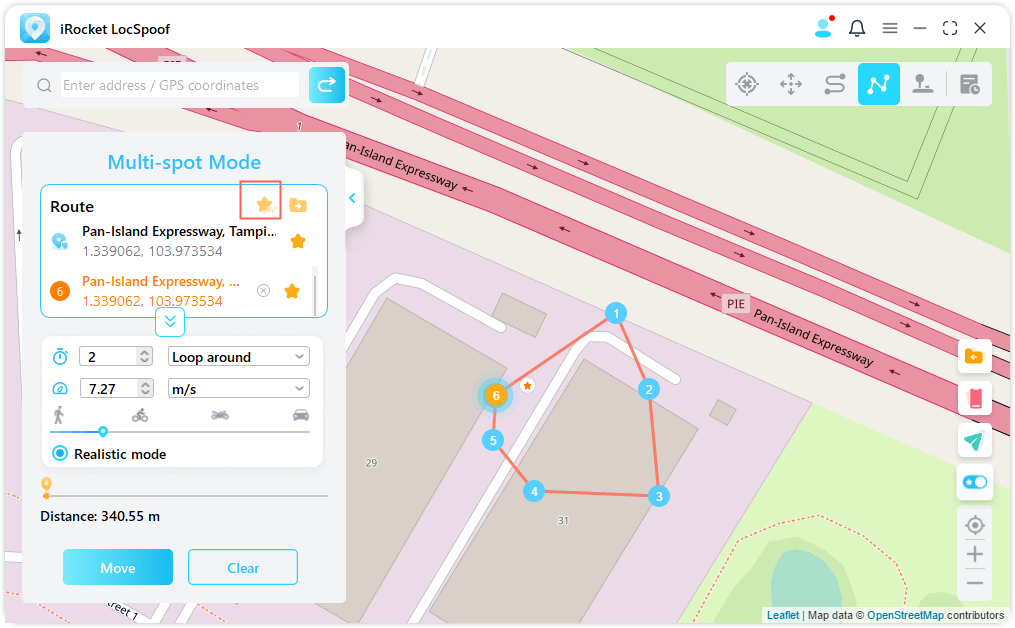
When creating a multi-spot route or two-spot route, you can also click on the Star icon to collect this route.
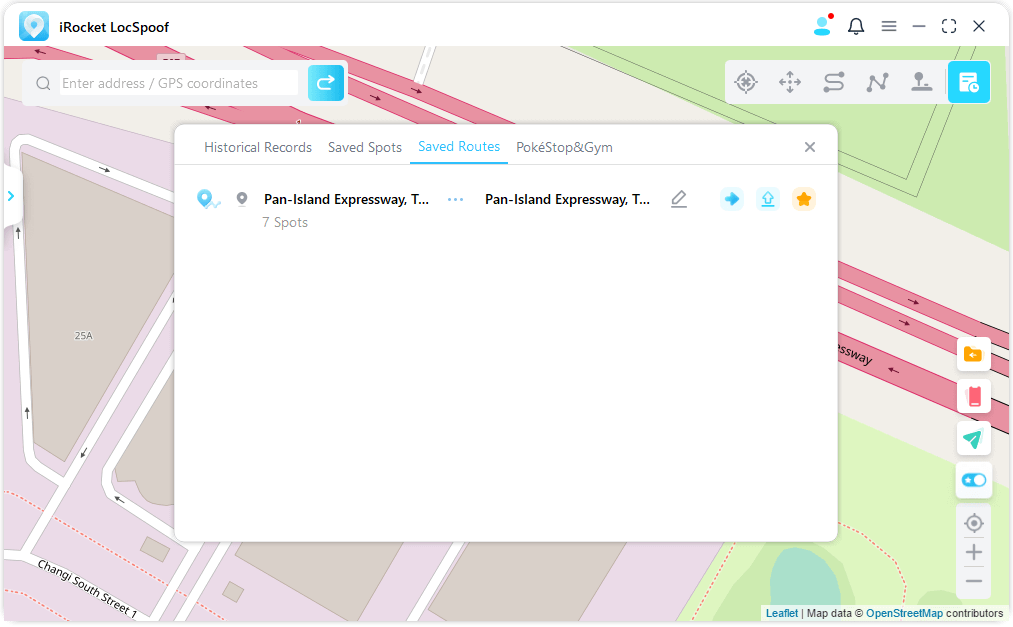
The collected spots and routes will be shown in the Saved Spots and Saved Routes panel.
Tap the Top icon to the left of the Star icon to place your favorites at the top.
Feature 5: Support 10 iOS Devices
iRocket LocSpoof supports changing GPS location of 10 different iOS devices at the same time.
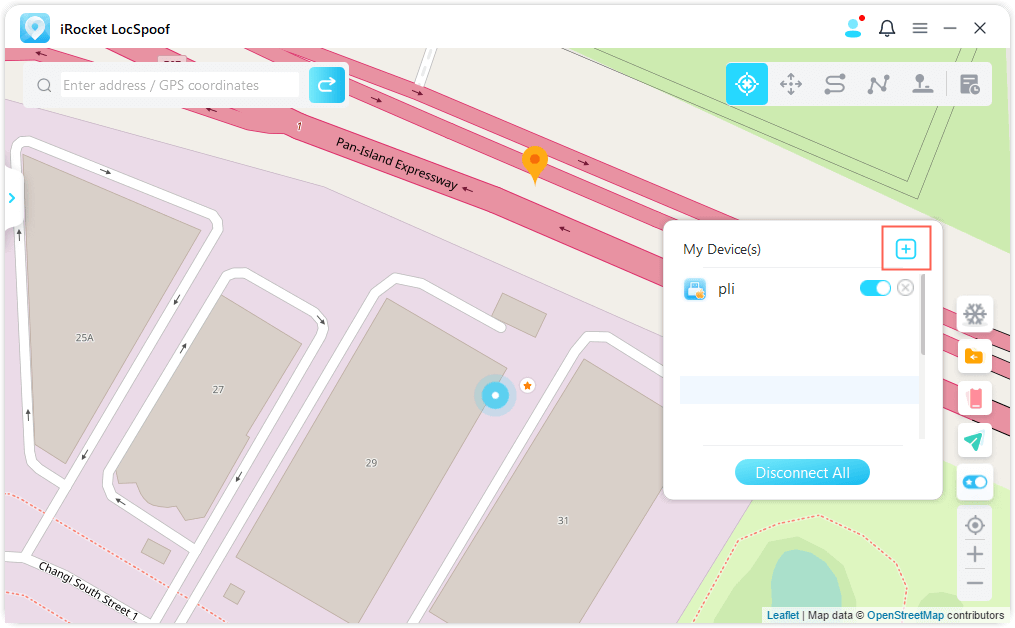
Click on the Phone icon on the right and it will show the connected device. Then click the Plus sign in the upper right corner.
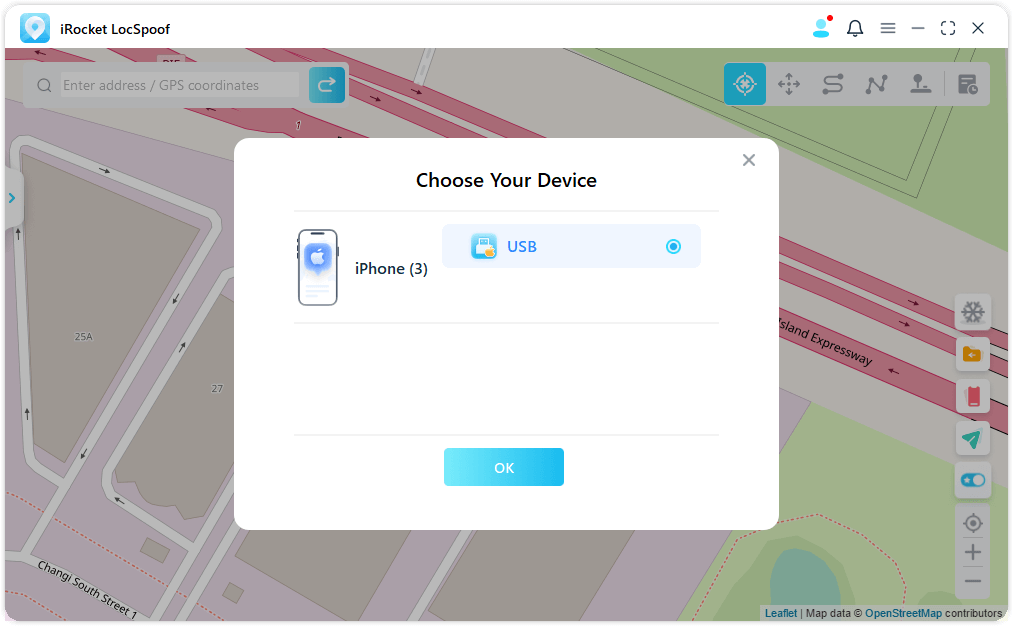
Choose the iOS device that you want to change GPS location at the same time.
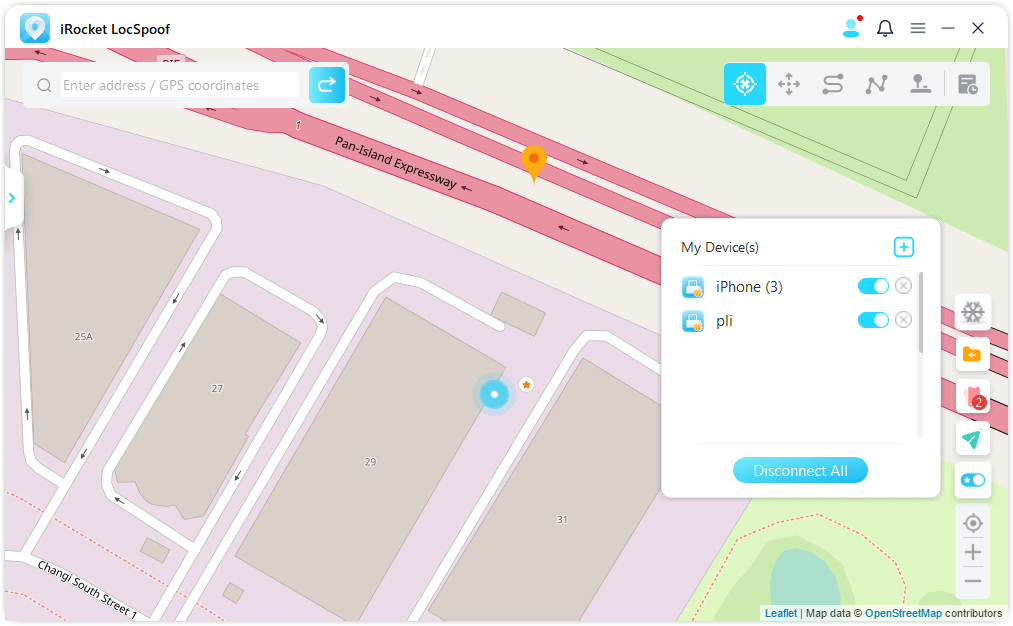
After trusting the computer, you can see all the devices on the right and select to turn off any one of them at any time. Or you can just Disconnect All.
Feature 6: Import/Export GPX File
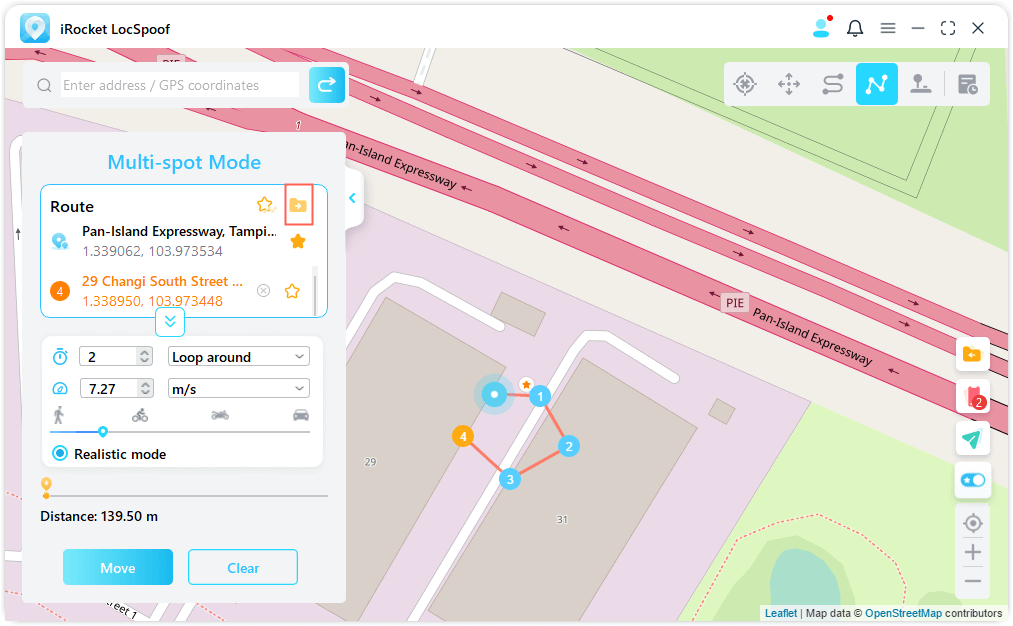
iRocket LocSpoof can import/export GPX file of single and multiple paths to save your favorite routes now.
Click on the Import icon on the right, and you can import the GPX file.
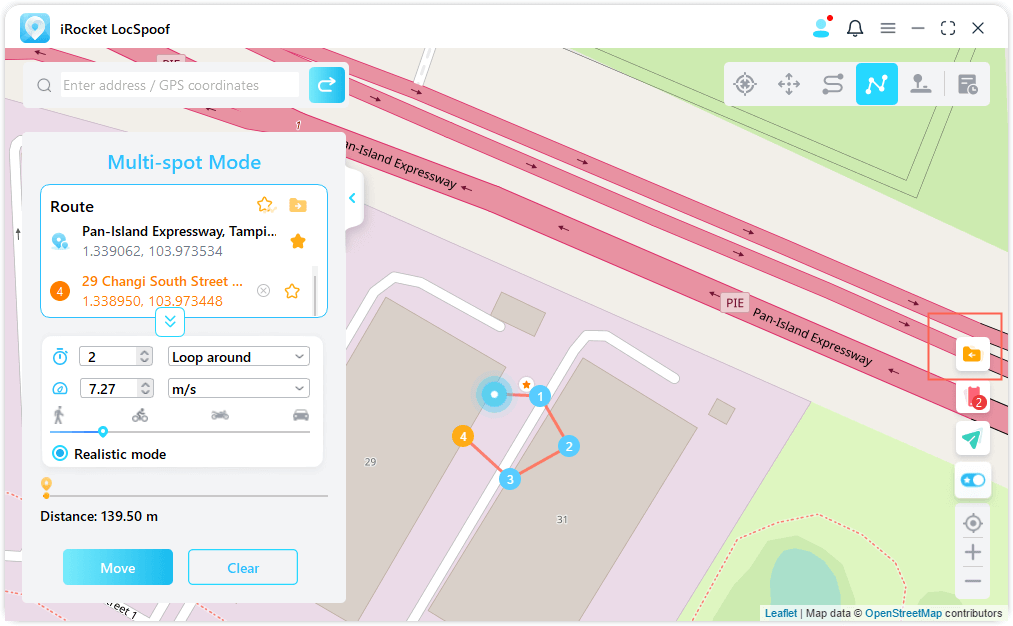
Click on the Exprt icon on the left route panel, and you can export the GPX file.
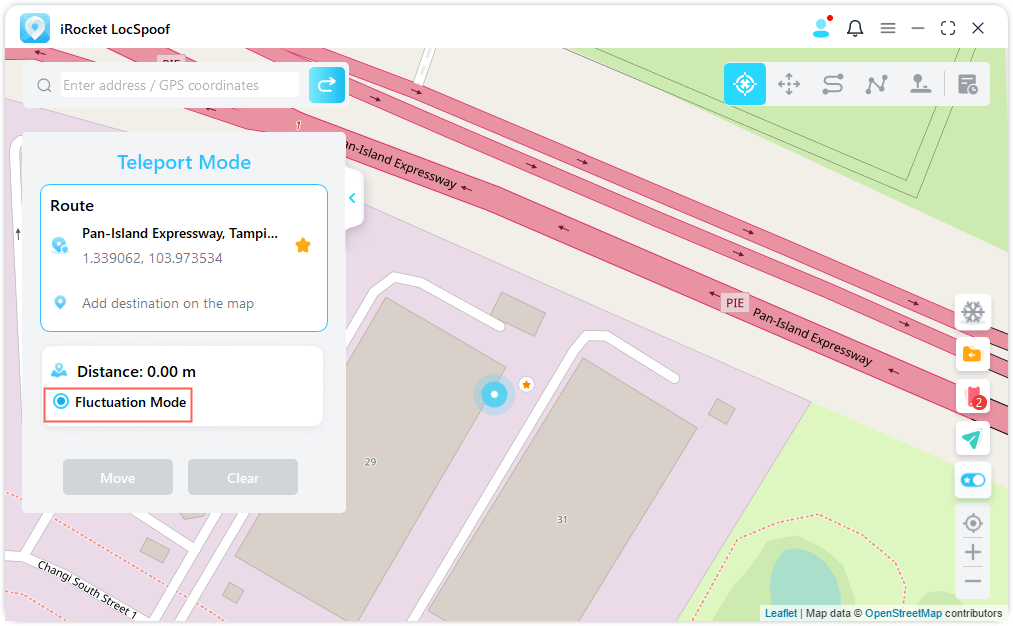
Feature 7: Fluctuation Mode
In the teleport mode, you can check the wave mode. After checking, the virtual positioning point will fluctuate back and forth within a few meters of the center of the selected position.
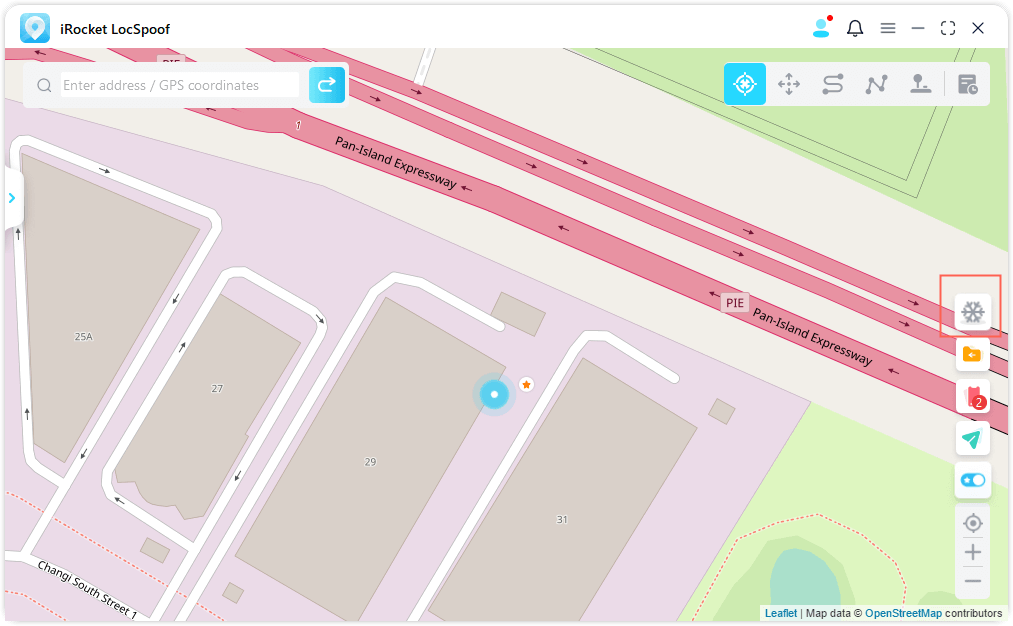
Feature 8: Cooling Timer Function
When you want to use the Teleport Mode or Jump Teleport Mode to modify the position with one key, you can turn on the cooling button in the lower right corner of the product interface, and the cooling timer will appear at this time.
When you select the desired location and click to move, the timer will calculate the corresponding cooling time according to the distance. It is recommended that you do not perform other actions until the countdown is over to avoid being under house arrest by the game.
Learn More: [Full Guide] How Does Pokémon Go Cooldown Work?
In addition, the jump teleportation mode can choose to automatically jump after cooling down.
When you finish selecting points and choose to automatically jump after cooling down, click the move button, and it will automatically jump to the next point according to the cooling down countdown time until the route is completed.
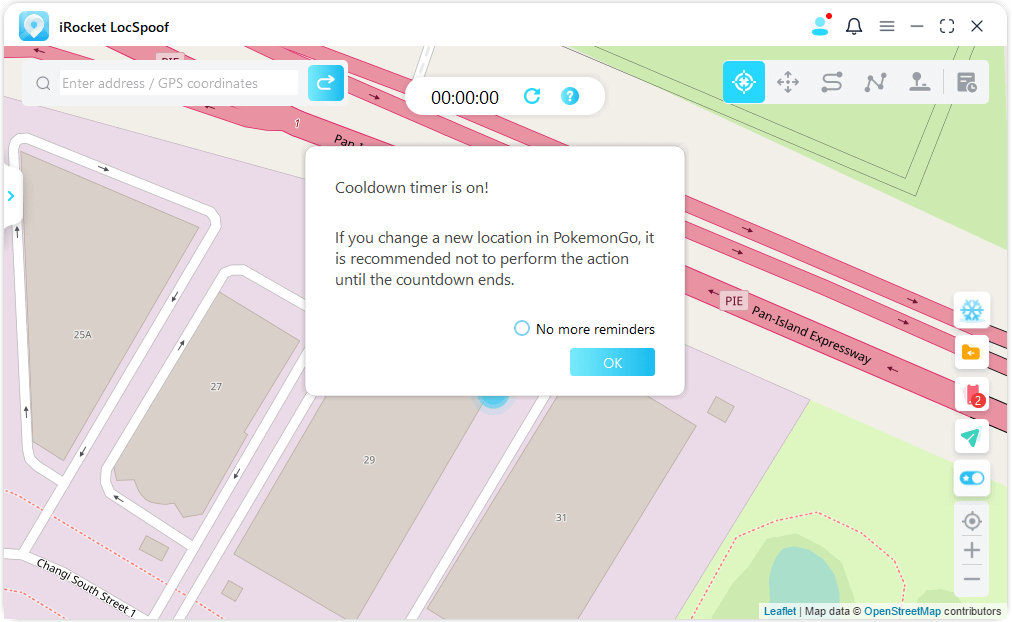
Click Reset, the countdown will be cleared, and the countdown will recalculate the time when you modify the positioning next time.
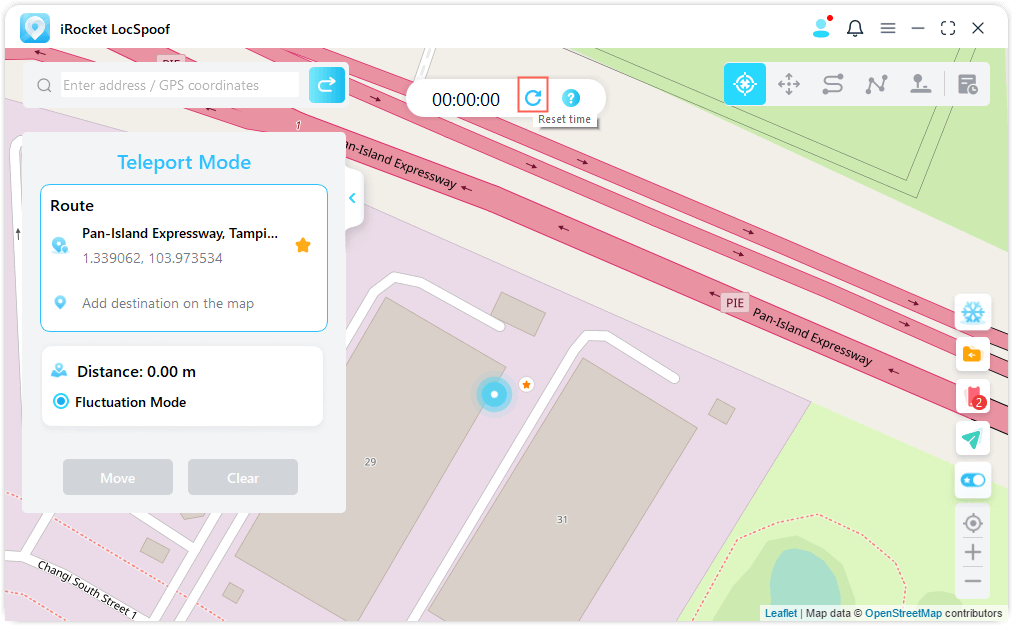
When you don't want to use the cooldown timer, tap the Cooldown button again to turn it off.
Feature 9: Map Collection - PokéStop & Gym
Added PokéStop & Gym feature in History & Favorites for PokémonGo users. You can choose your favorite region and click to go to the region.
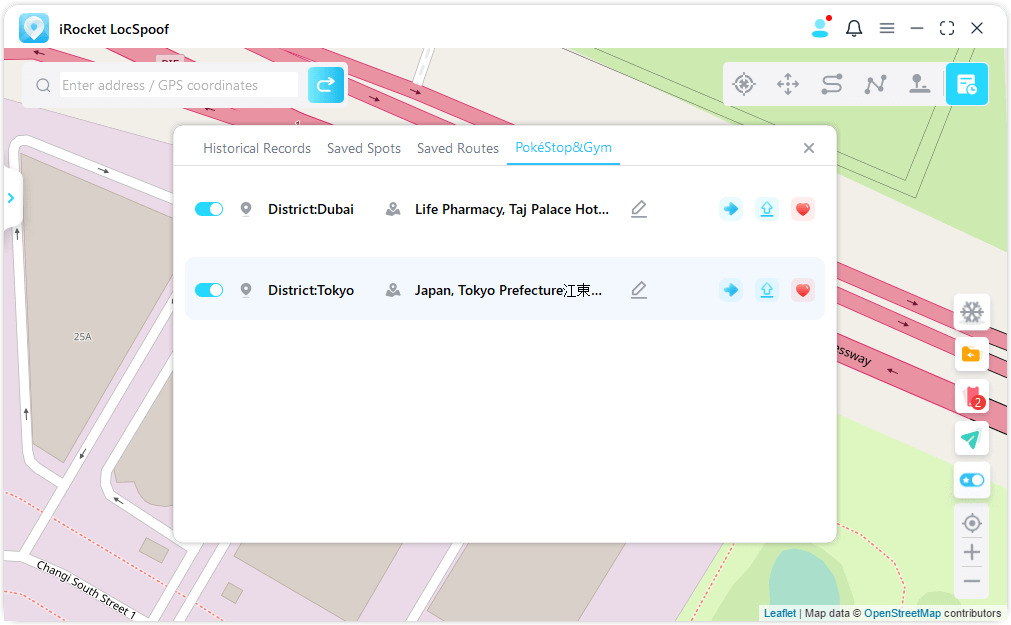
You can see all PokéStops and Gyms in the area in the area. You can simulate movement or modify the virtual location to collect items at PokéStops or fight at Gym according to your needs.
If this feature is not useful to you, you can click the close button and the icon will not be displayed on the map. If you like a certain region, you can click Like.
